Well, here we are—it’s time to put this bad boy together! Go ahead and lay out your blocks on your design wall (or floor) using the following image as a guide for which finished size goes where.
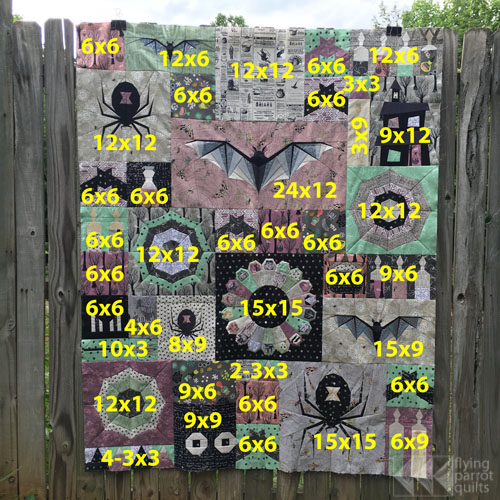
If you have not yet cut your solid filler blocks, here are the sizes you will need:
- 1 – 3½” x 3½” square
- 6 – 6½” x 6½” squares
- 1 – 12½” x 12½” square
- 1 – 6½” x 9½” rectangle
- 1 – 3½” x 9½” rectangle
- 1 – 4½” x 6½” rectangle (or 3½” x 6½” if you resized your small spider to 9½”x9½” and made the 9½”x3½” broomstick)
Of course, you can substitute additional blocks (such as witch hats, candy corn, or variable potion blocks) for any of these as well.
As you may have noticed, in this layout there are not a whole lot of long straight seams that run along the entire quilt, so we need to use a technique called “partial seams.” It’s exactly what it sounds like, and it’s super easy!
Begin by sewing your blocks together into the following sections:
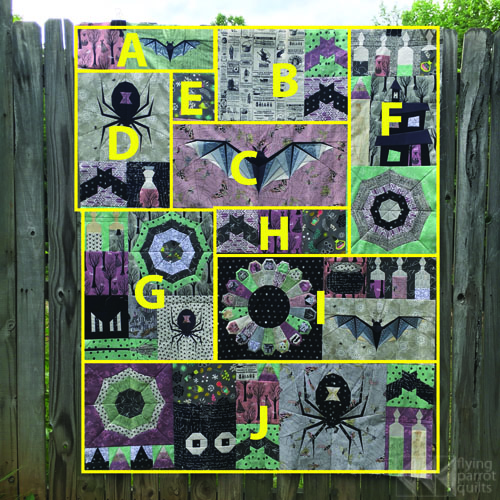
Once you have sewn your blocks into sections, assemble sections A-E using partial seams. The following pictures use a small quilt block to demonstrate, but it’s exactly the same technique for larger sections—you’re just sewing longer seams!
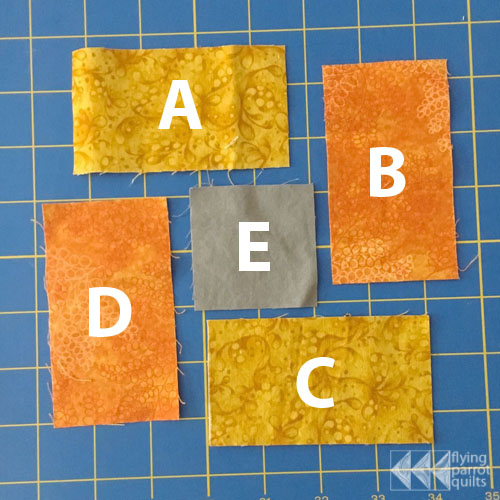
Begin by placing E on top of A, right sides together, and lining up the righthand edge. Sew these two pieces together, but not all the way. Stop your seam about 1-2″ before reaching the uneven edge and backstitch to secure:
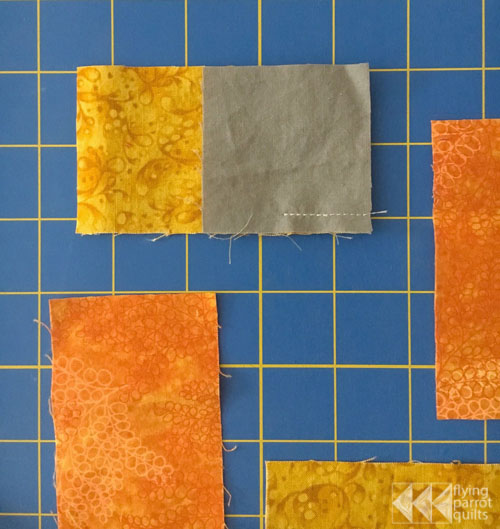
Open the pieces up and finger press the end of the seam upwards towards piece A.
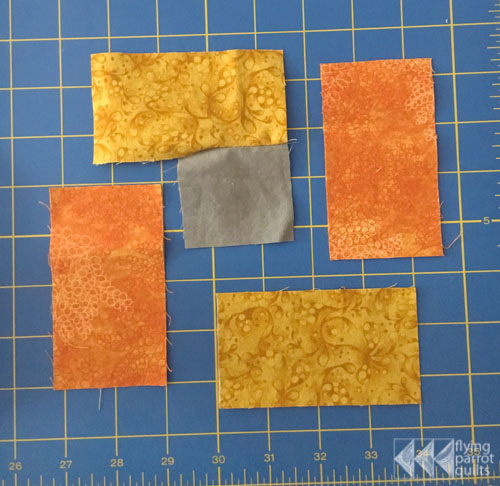
Now, you can attach B to the unit you have just made. Sew the entire seam:
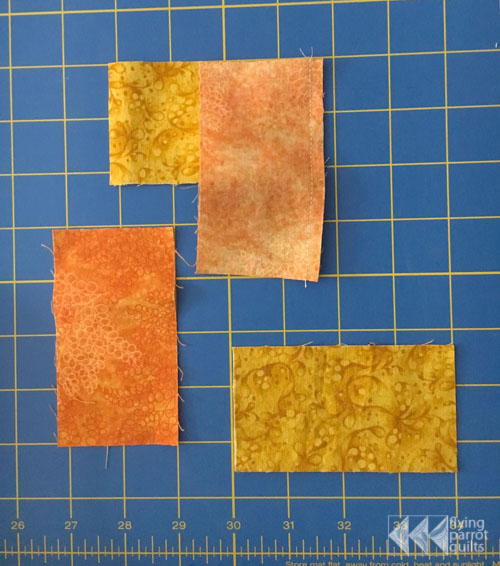
And press the seam.
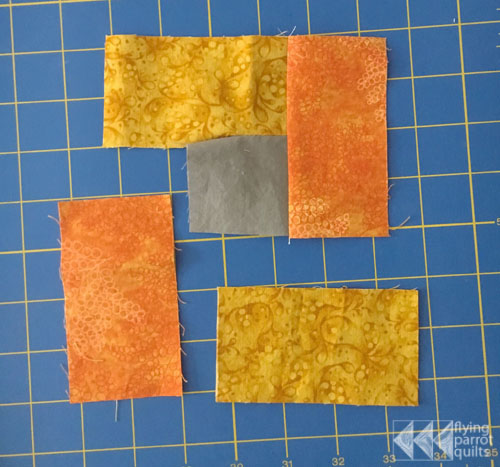
Continue around, sewing on piece C:
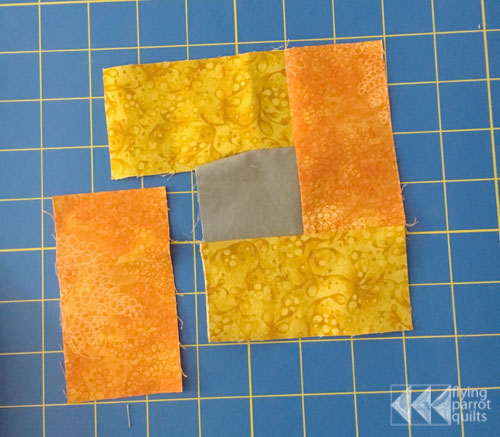
And piece D, being careful to not catch piece A in your seam:
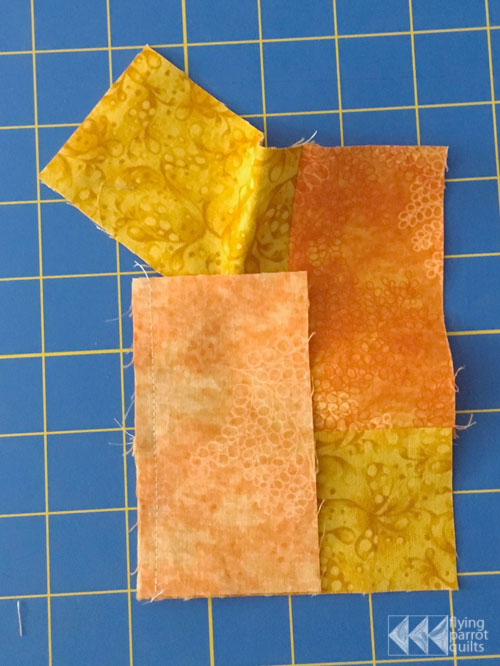
Press the seam. Your unit should look a little like this:
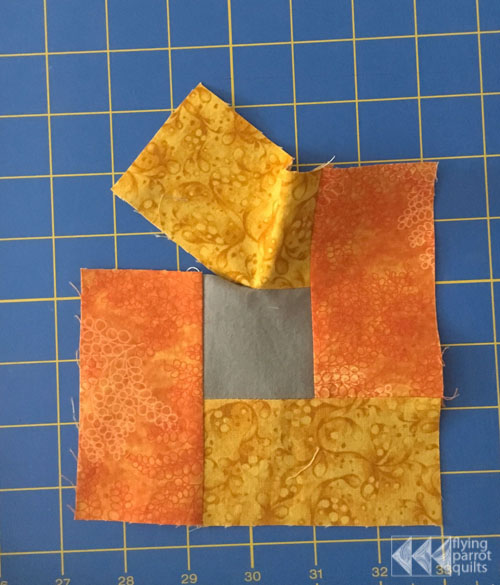
Now, all you need to do is finish the first seam that you only partially sewed. Line up the edges as normal.
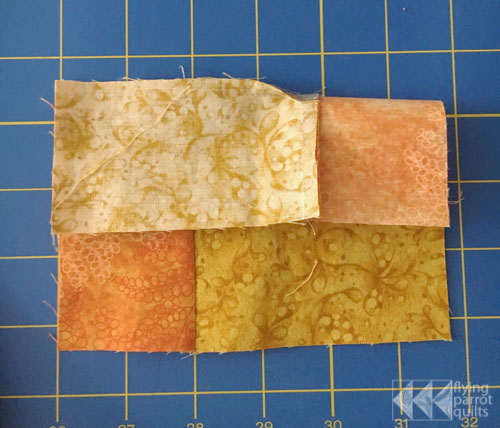
And sew the remaining part of the seam a little past where you originally stopped, backstitching for security.
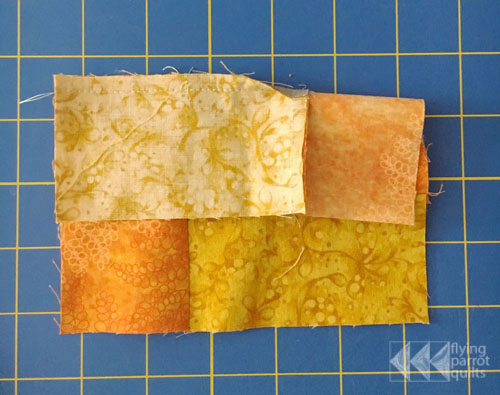
Now you can press the final seam with your iron!
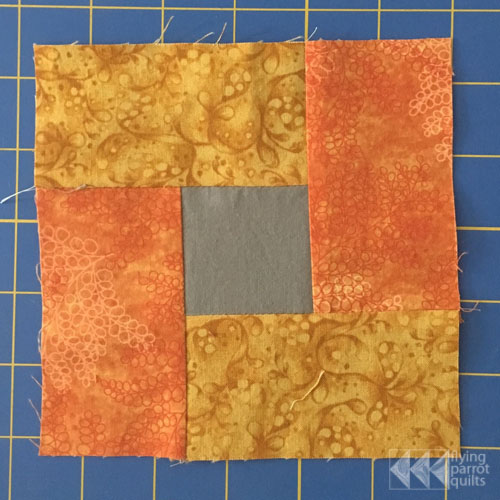
Again, while this was a small block, it’s exactly the same for larger sections! We will need to use another partial seam to add sections F-I.

- Add section H to the bottom right of the large bat block (section C) with a partial seam (open to the left).
- Sew section F to the right side of sections ABCDE/H.
- Add section I to the bottom of the F/H section, sewing the full seam.
- Add section G to the left of the H/I section, sewing the full seam.
- Finish the seam between H/G and the rest of the blocks.
- Sew section J to the bottom of the quilt and you are done!
Congratulations, your quilt top is done! Because of all the paper piecing in this quilt, I strongly recommend stitching around the entire outside edge of your top (about 1/8″ in) with a relatively short stitch length (2mm or so) to secure all the seams and tame bias edges.
This concludes the main portion of our quilt-along, but since I haven’t revealed my finished quilt yet, come back next week for photo overload and, I hope, lots of ideas for you on how to quilt your finished quilt! Thank you all so much for quilting along!
Tag the photos of your finished tops with #epichalloweenqal and the hashtags for all the patterns included (#midnightbitepattern, #ringofcoffins, #eyeballquilt, and #spookyspiderpattern)!


I fell in love with your quilt the moment I saw it (less than a month ago) and I have just finished downloading all the patterns, and I’ve collected most of the fabrics. I’m having a tough time finding Ghastlies, but managed to get the pink Web. I plan on doing mine monthly over the next year, so it is ready in time for Halloween next year. Thank you so much for your generosity with a (mostly) free pattern!
Great idea!! I just found this today and think I too am going to accomplish this beauty in a monthly fashion as well starting next month to be done just in time for next year!
I found you quilt today. It is to late for Halloween this year but, I can have one next year. Thank you for the links, and wonderful tutorials.
Hi Sylvia!
I just had a question. All the block measurements shown on your second picture above – I assume this means the finished measurement? So all the unfinished blocks need to be 1/2″ bigger? Is this correct? Thanks!
Marie
Yes, that’s correct. Those are the finished measurements. 🙂