I’ve partnered with Electric Quilt to share about how I use EQ8 in my quilt design, and since designing with negative space is sort of my thing, I thought I’d share a tutorial on a few different ways to get your designs with negative space into EQ8. I’ll be showing you the techniques using the quilt design shown above, which is one of the simplest ways of adding negative space, but I’ve noted below what sort of other designs these techniques are good for.
Technique 1: Blank Blocks
The quickest way to get an idea of what your quilt will look like is to just use blank blocks in a traditional square layout. For this one, just set your blocks where you want them, in this case in two columns in a 6×7 block layout:
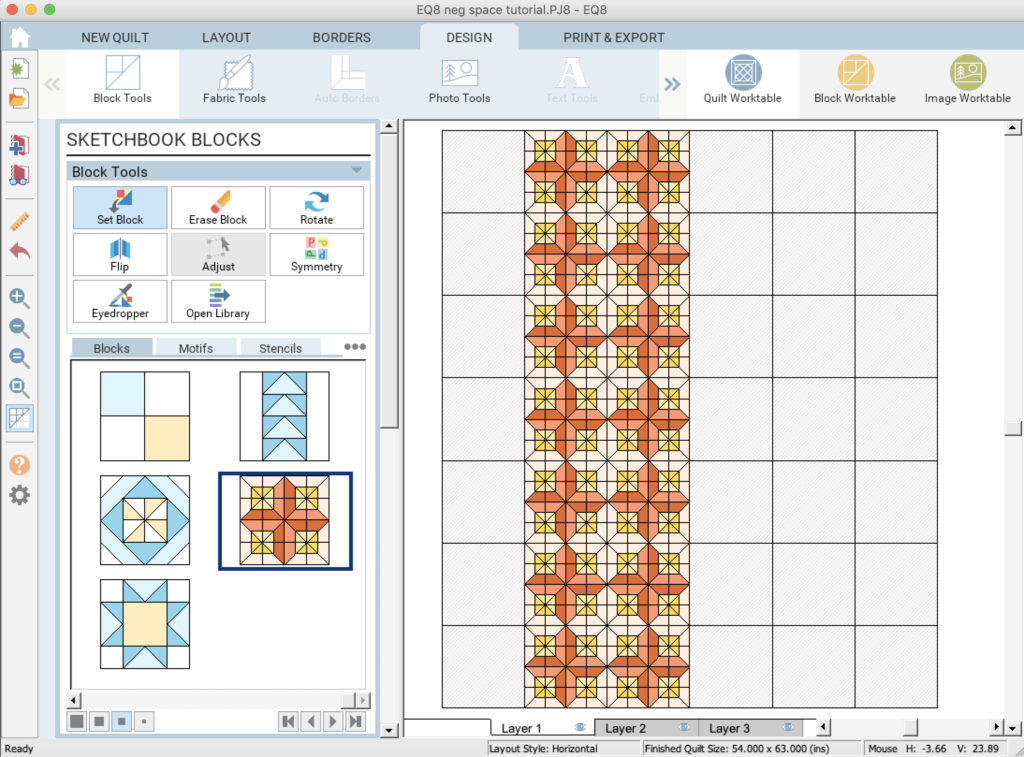
Then, just fill in the empty blocks with the background color.
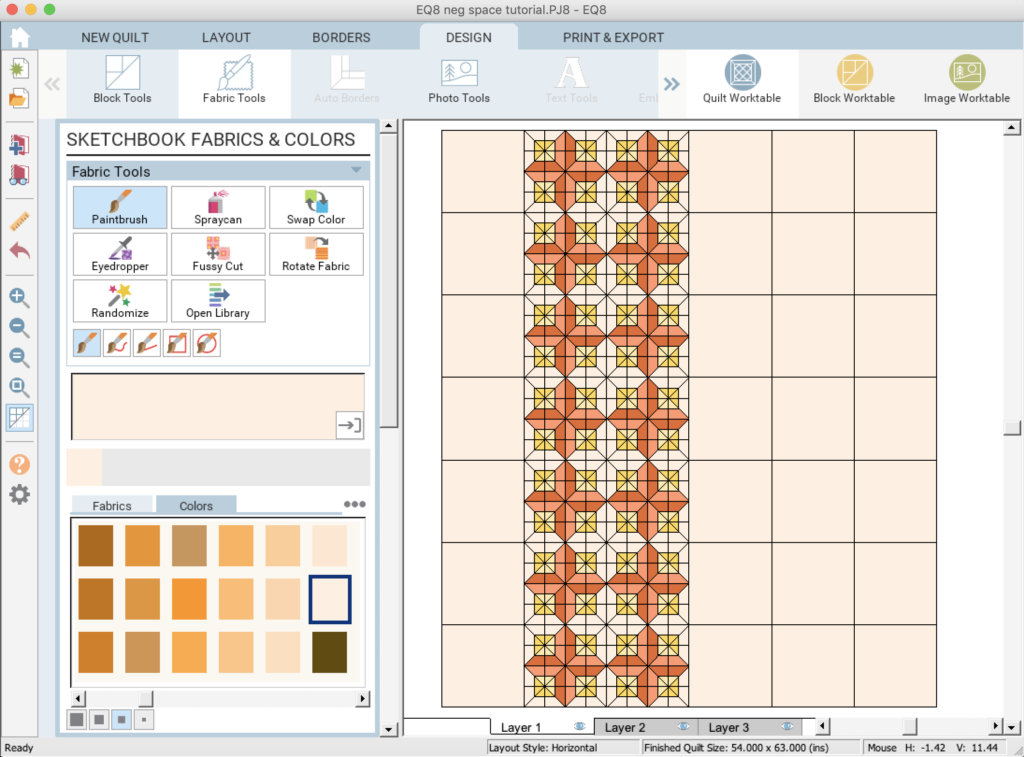
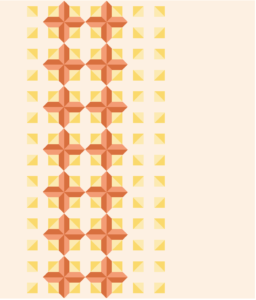
Pro: Works for most quilts. Quick and easy so you can tell whether it’s worth investing more time in a design. I always use this technique when first playing around with design possibilities. I also like this for quilts that feature partial blocks, as in the example below, to get a quick idea of what that looks like (I just filled the cross shapes with the background color).
Con: Doesn’t give you sizes to cut for the negative space (you wouldn’t actually sew blank squares together to make this quilt). Won’t work for negative space that is an odd shape or between the blocks.
Technique 2: Borders
This one really only works for quilts like the example quilt, where you have negative space that extends across the entire length or width of the quilt, but it’s a quick and easy way to get the piece sizes correct for these types of quilts.
Start by creating a layout of only two columns of blocks.
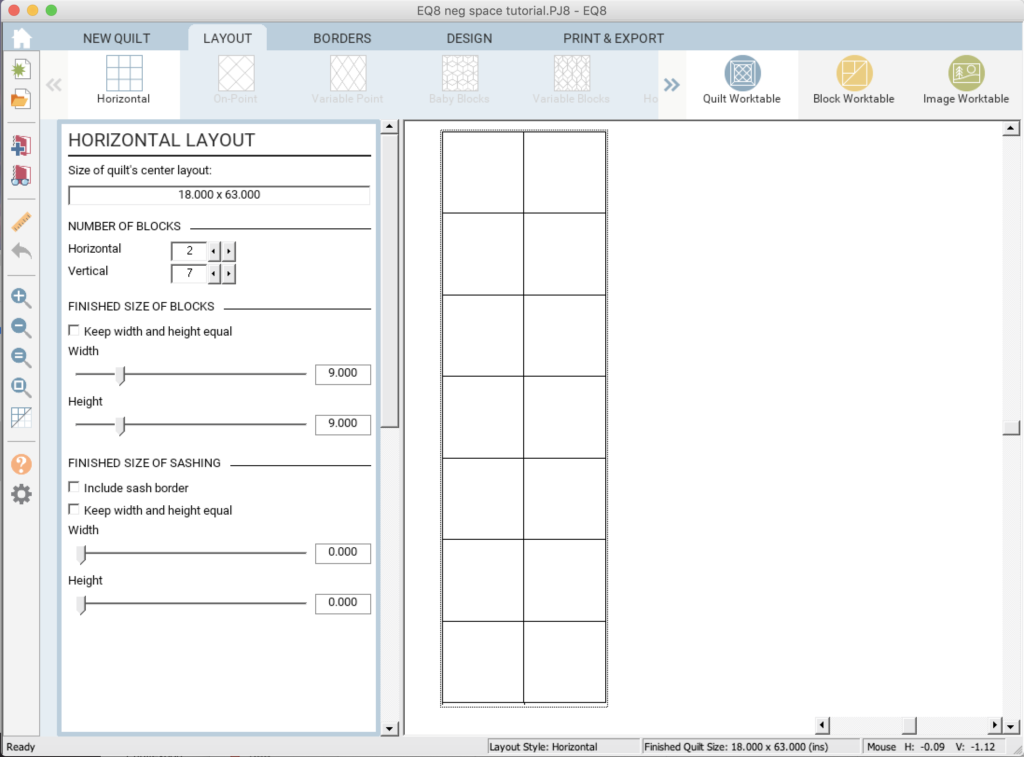
Then, in the border pane, set the top and bottom borders to zero, and the left and right borders to your desired widths. You might have to un-click the “Lock size adjustments” options.
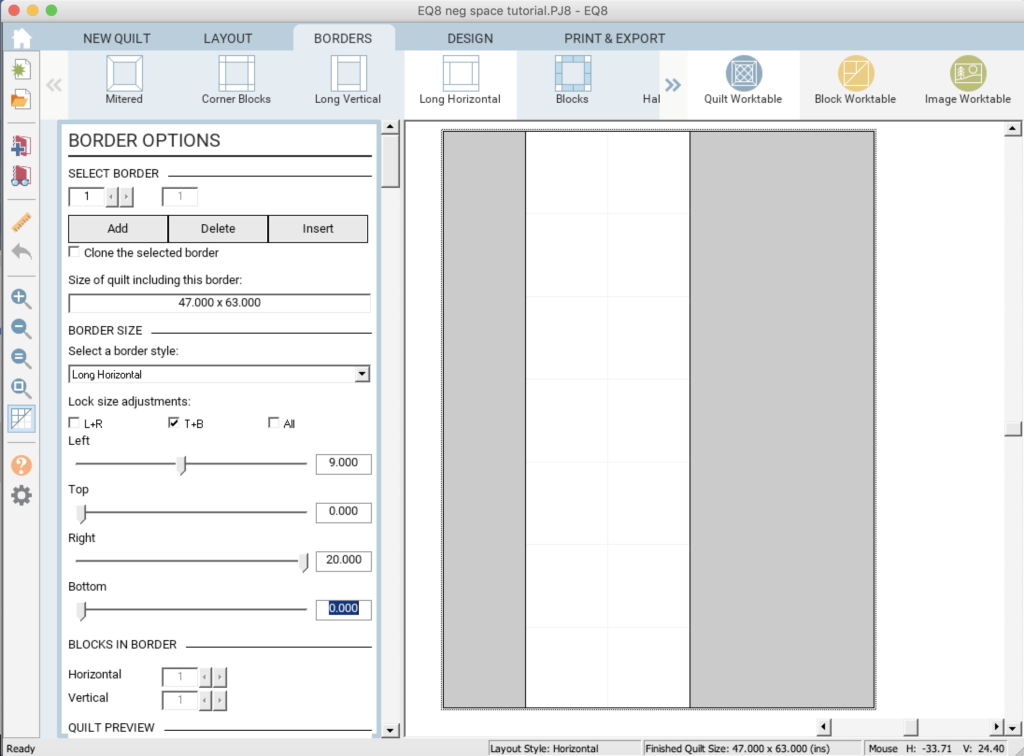
And then in the Design pane, set your blocks and fill the borders with the background color.
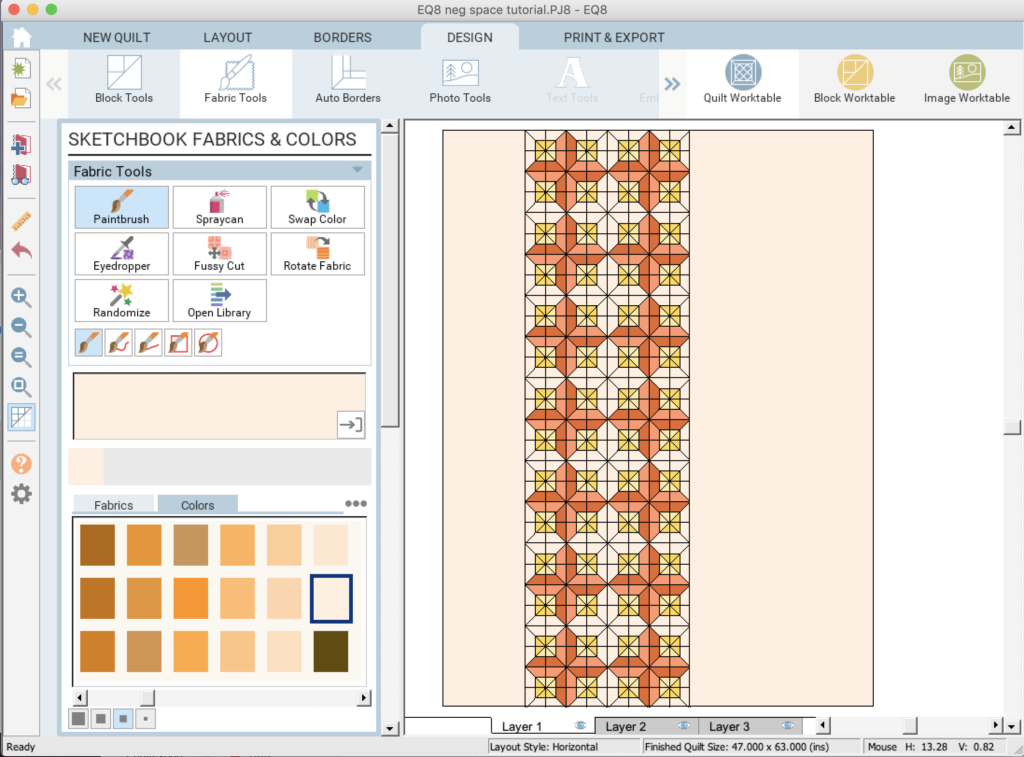
Pros: Even quicker and easier than the previous technique, and gives you the correct size fabric pieces for actually assembling the quilt.
Cons: Works for a very limited sort of quilt design, where the negative space is essentially a border. You can combine it with the previous technique to stretch this technique a little, but only to a point.
Technique 3: Custom Set
Using the Custom Set option is the most tedious, but the options are essentially unlimited, and this will result in accurate piece sizes for patches of negative space in whatever shape(s) and size(s) you need.
Start by choosing the “Custom Set” option in the New Quilt pane.
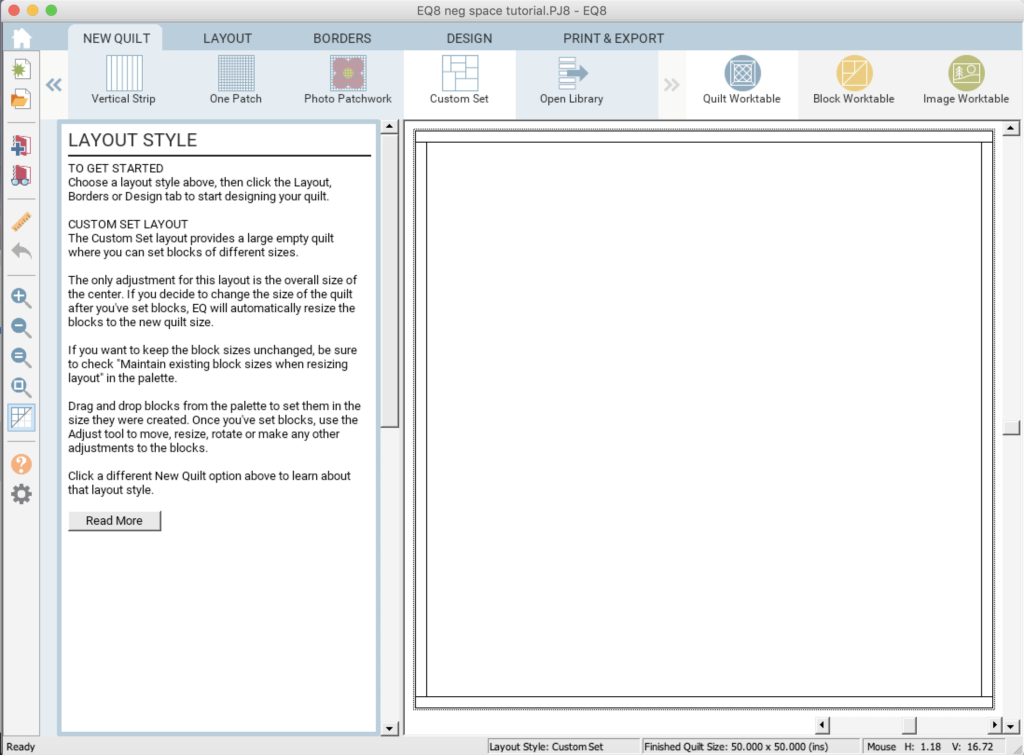
Set the size of your quilt top under “Layout.”
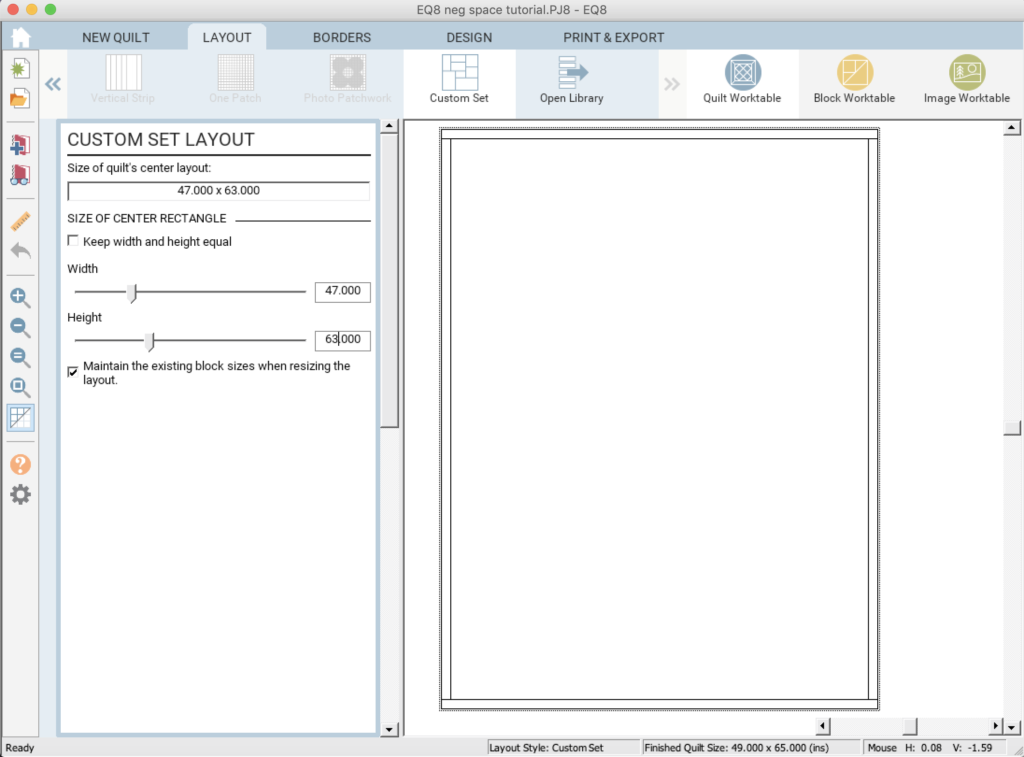
You may also want to delete the borders.
Drag and drop one of your quilt blocks onto the layout.
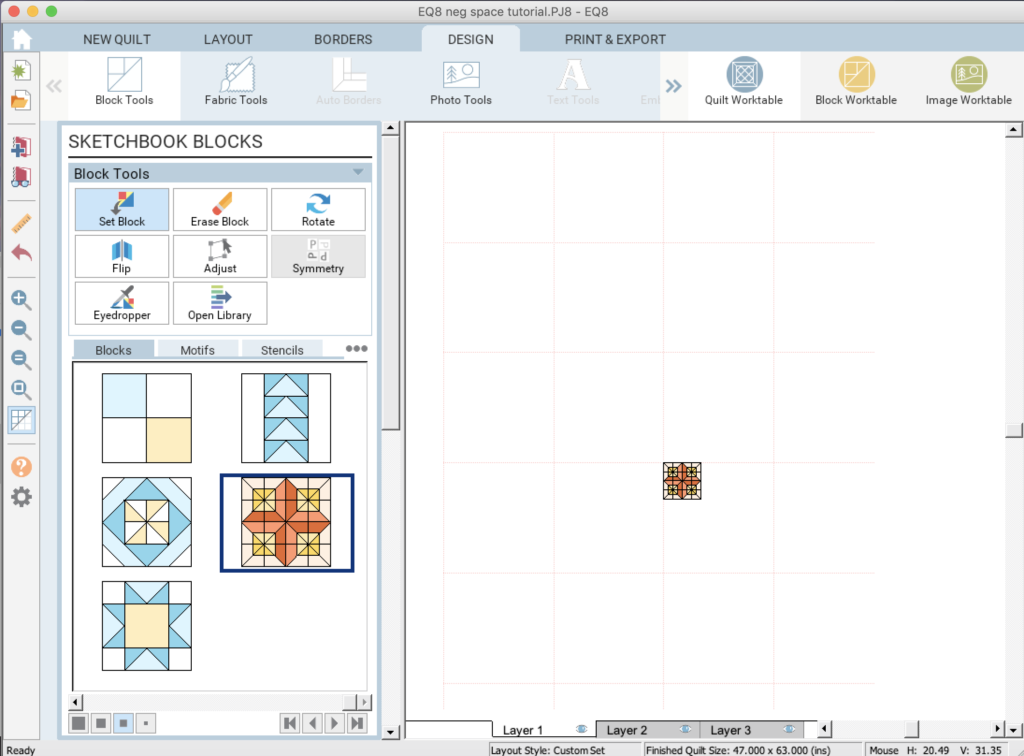
In the “Adjust” pane, enter the desired block size.
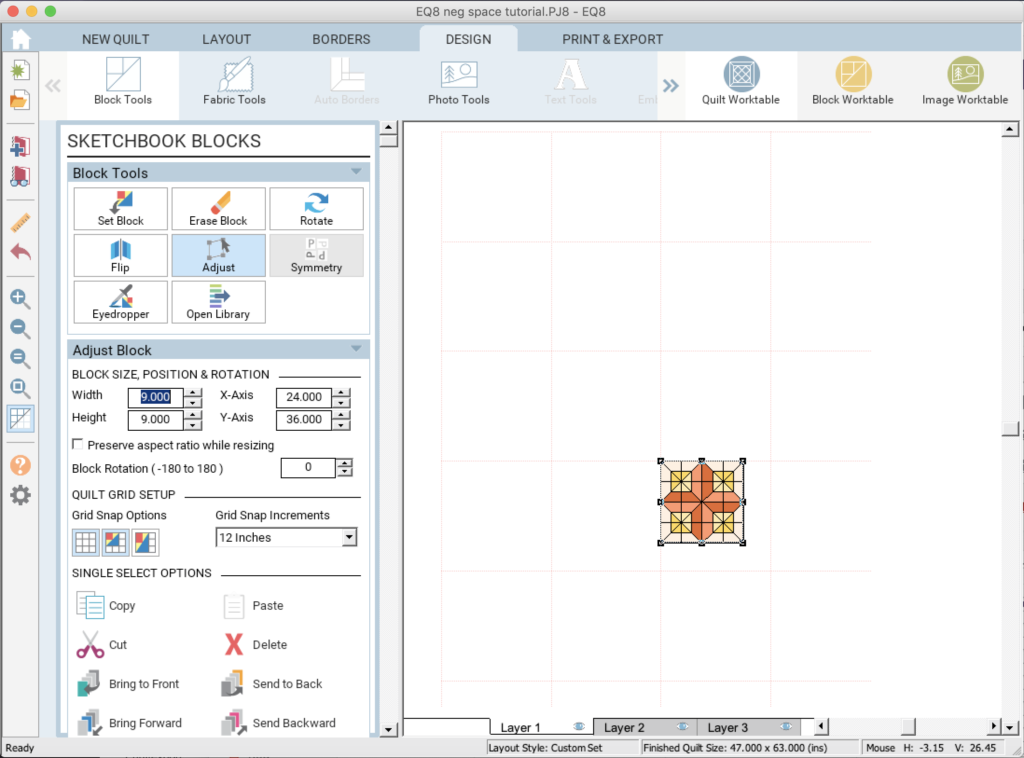
You might have to change up your grid snap increments, depending on where you want your block. I used 1 inch, since my block size was 9 inches and that wasn’t an option. Drag your block to where you want it.
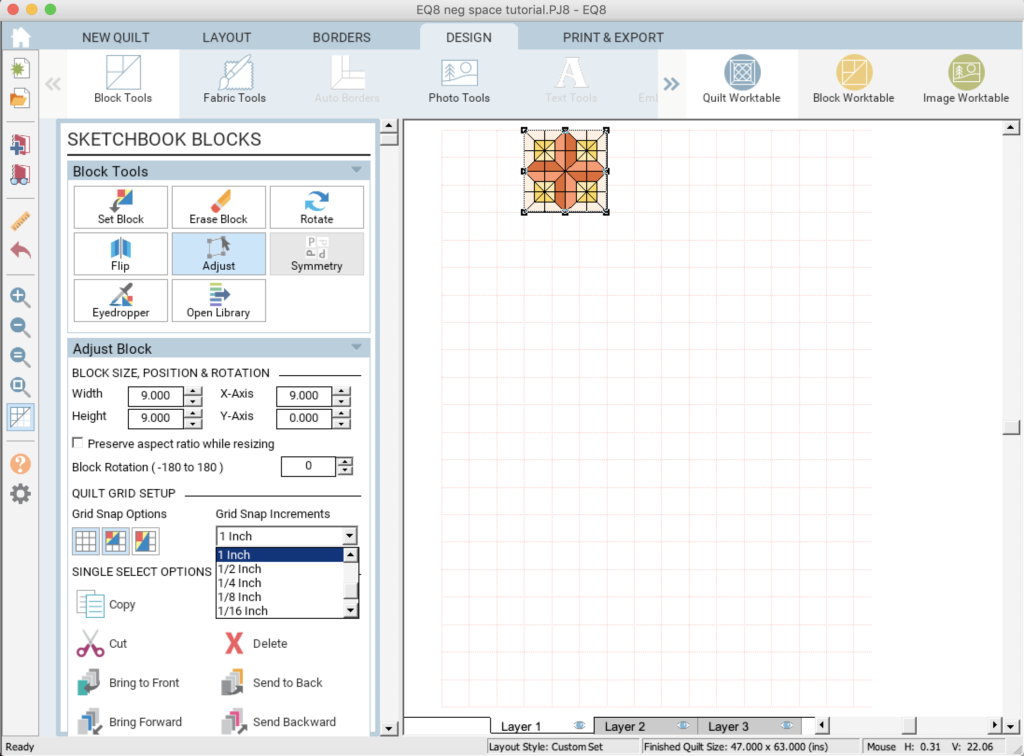
Instead of dragging and dropping, and then resizing every block, I just clicked the block and then copied and pasted. From there I dragged it into position.
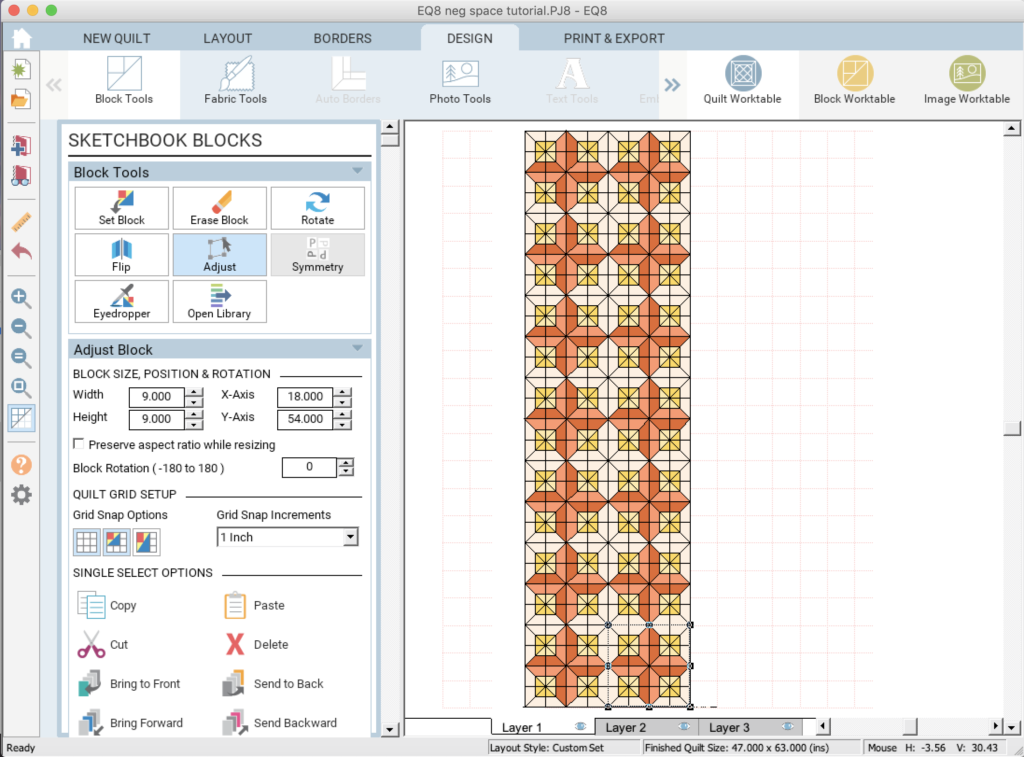
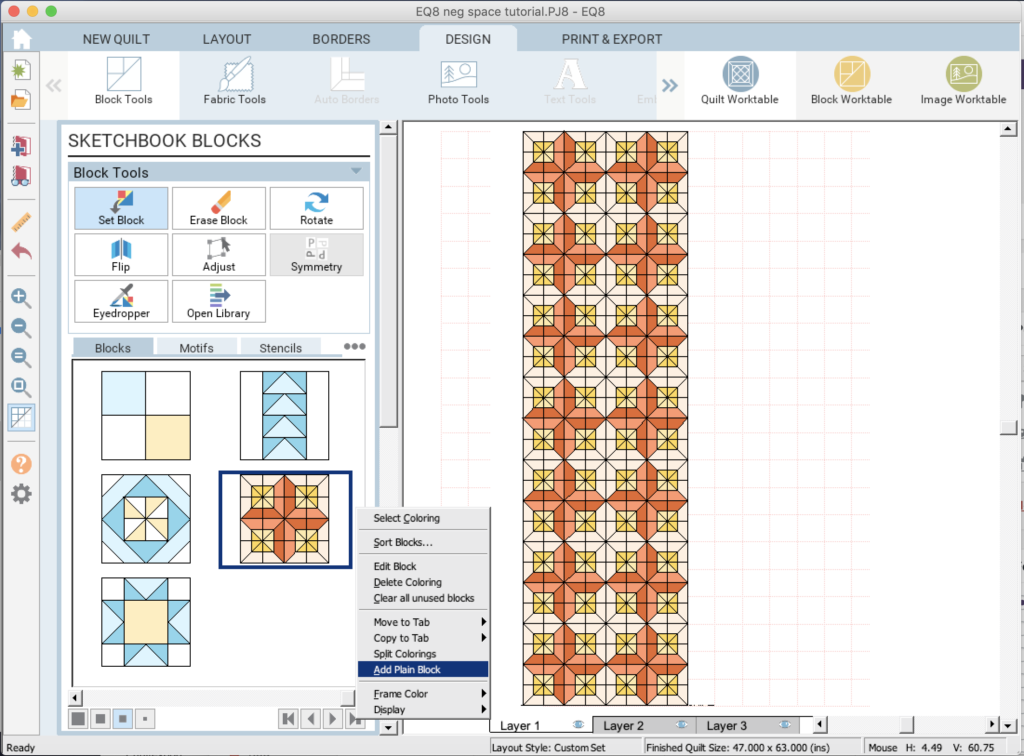
To add the negative space, go back to the block pane and right click (control click on a Mac). Select the “Add Plain Block” option.
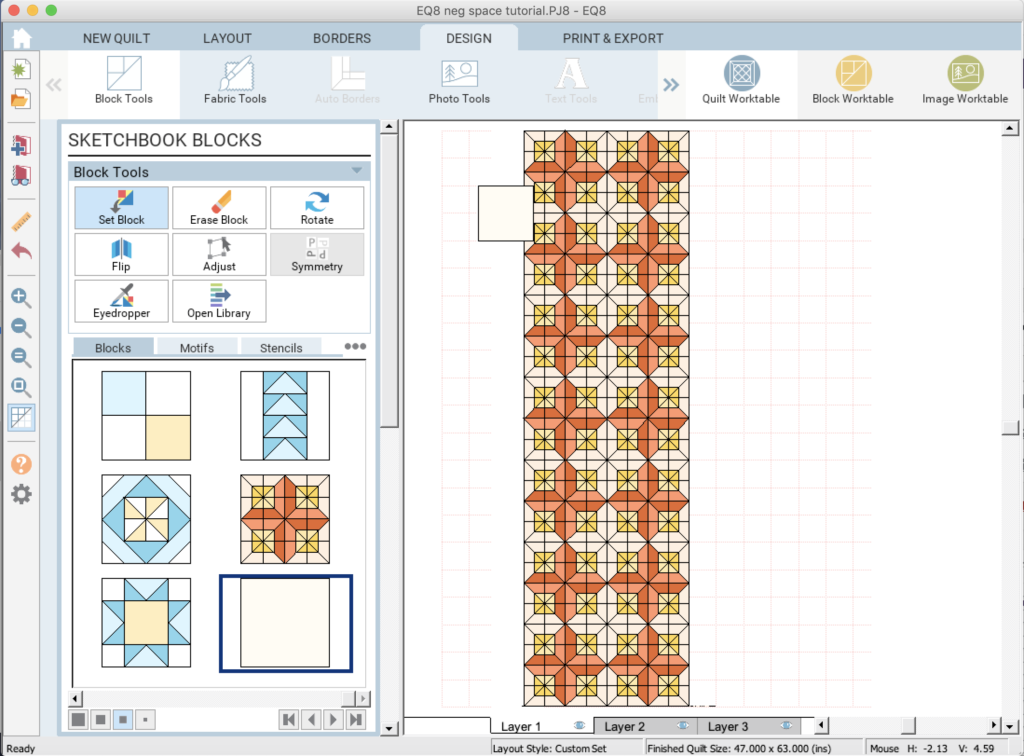
Now you can drag and drop the resulting plain block.
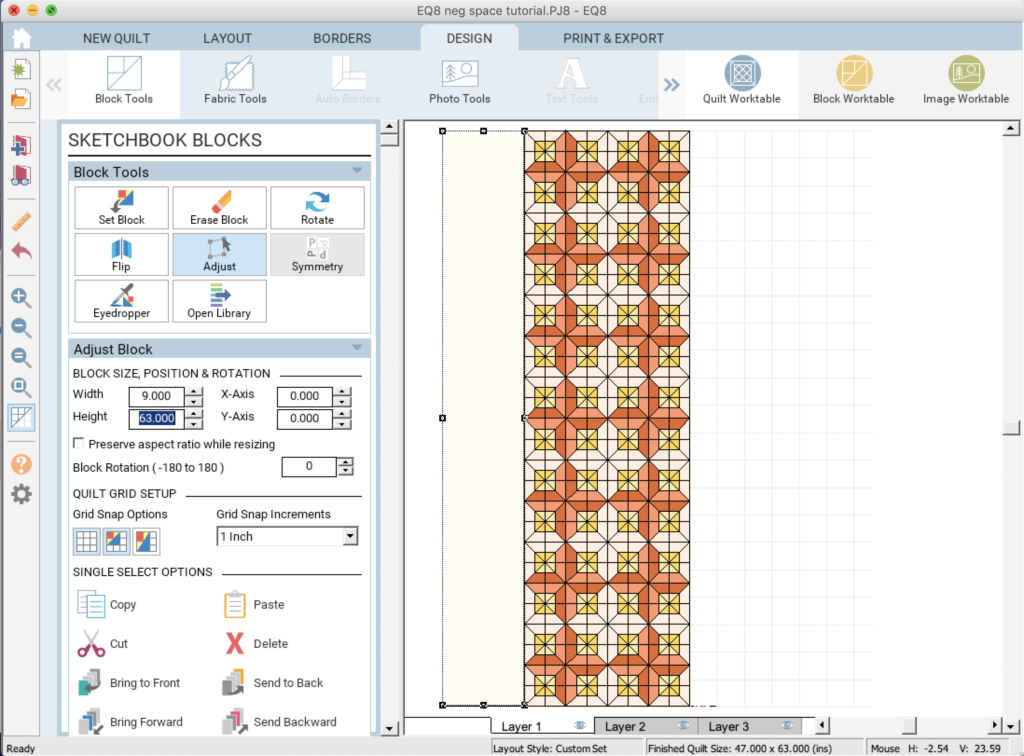
Back in the Adjust pane, you can either enter the size, or drag a corner to resize the block. If you do the latter, make “snap block size to grid option” (the last icon under “Grid Snap Options”) is on.
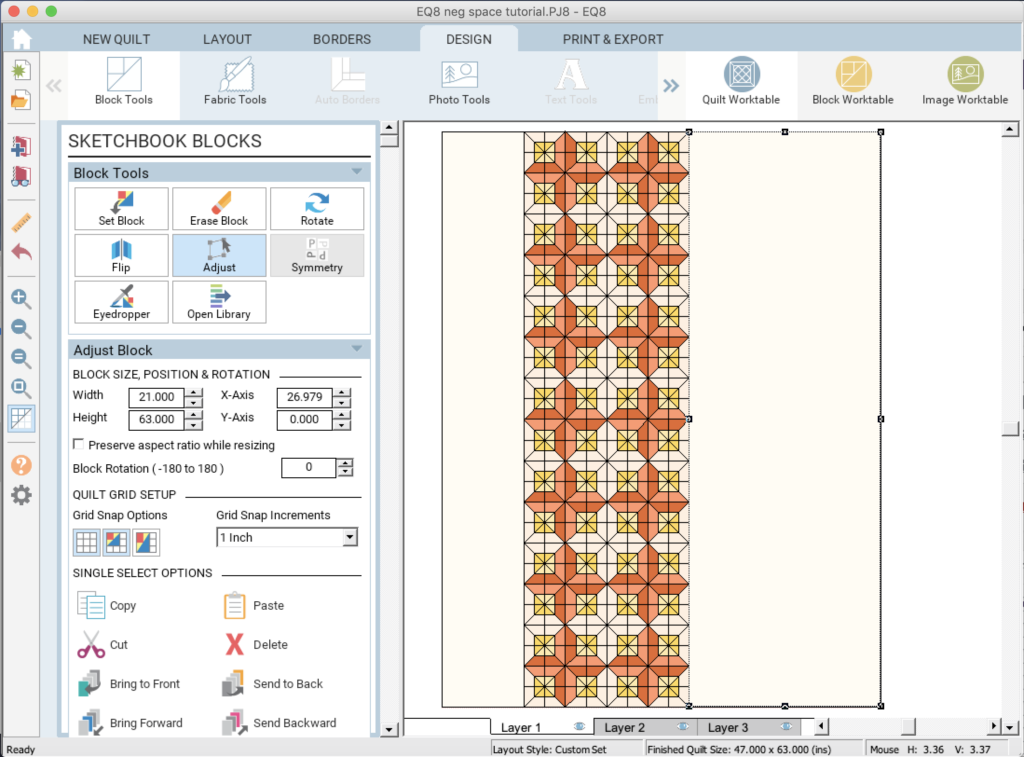
Repeat for the negative space on the other side of the blocks.
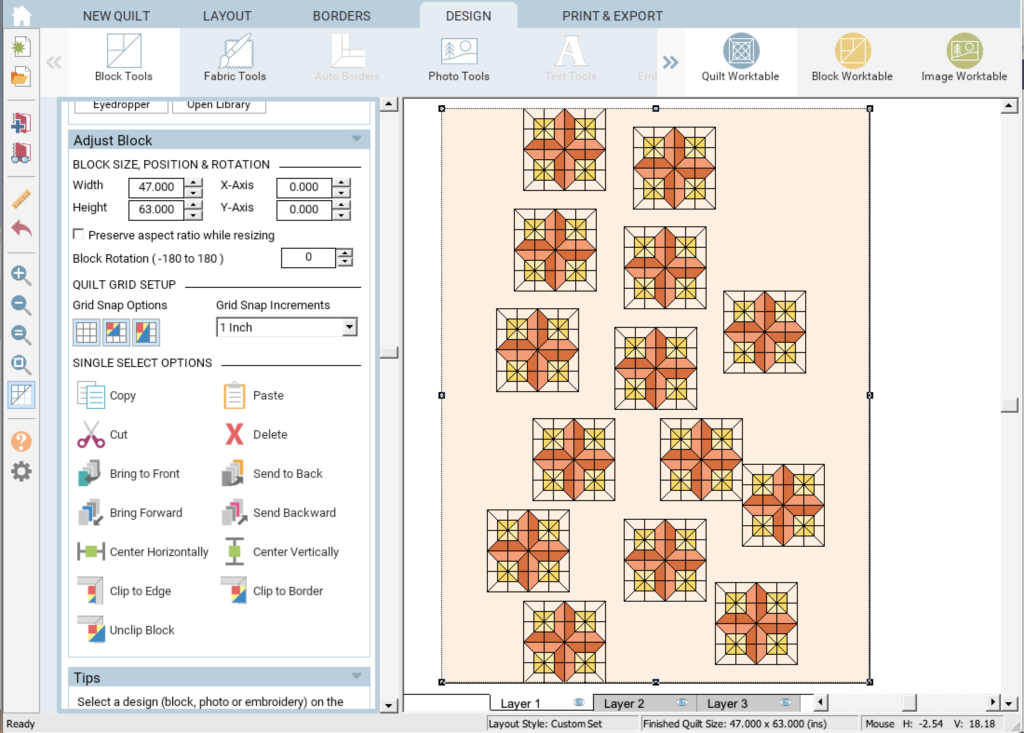
(There is one even easier way of doing this if you just want a quick visualization and aren’t trying to get dimensions for each individual patch. Set your blank block to the size of the full quilt, then click “Send to Back.” Now you can feel free to move your blocks about on top of the negative space to take full advantage of the freedom of Custom Set!
)
Pros: Incredibly versatile, especially for quilts with many pieces of negative space in different sizes.
Cons: Time-consuming if you’re creating lots of patches of negative space individually.
If you’d like to give EQ8 a try, you can use EQ8SYLVIA for 20% off everything, including software and books, at electricquilt.com! Good through March 31, 2020.


I use the first technique when I’m designing a quilt but I will definitely be trying out the third technique sometime soon.