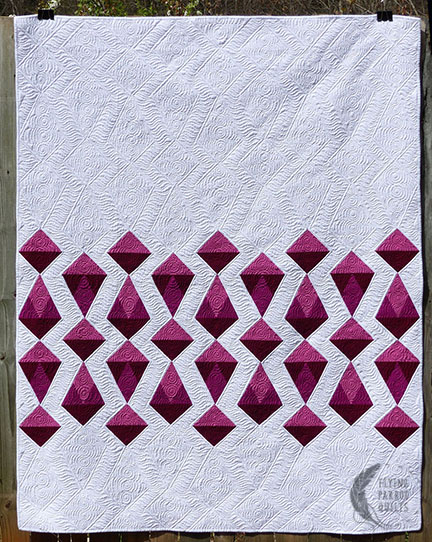
For those of you who have my book (if you don’t have it, you should! Pick it up a signed copy here!), today I’m sharing a bonus pattern for a second quilt made using the templates from Jewel Drop.
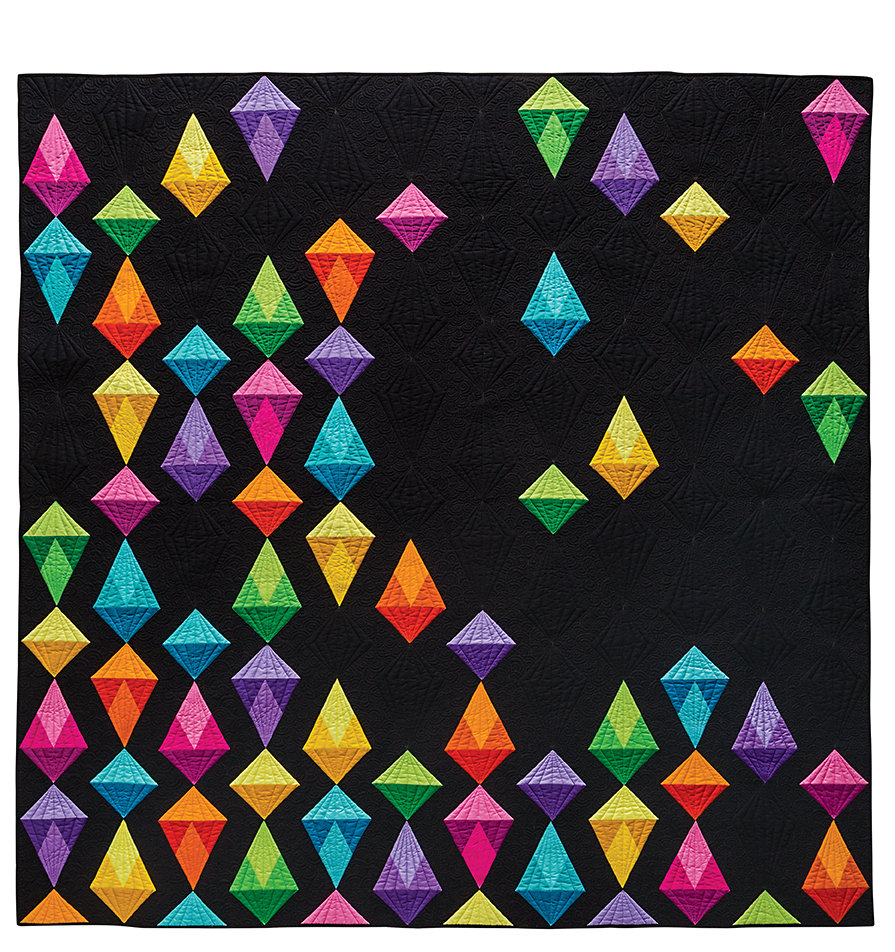
Both Jewel Drop and this quilt are based on a traditional block called “Red Peony Buds.” For Jewel Drop, I used the disintegration technique to design the quilt; this one uses the technique of setting blocks in rows. As with the original quilt, the blocks form an interesting secondary zigzag pattern, and in both cases this provides the opportunity for an interesting quilting design.
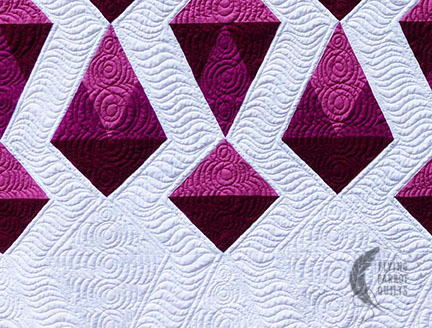
This quilt, Jeweled Bracelet, was actually made first. It was featured in Modern Patchwork in 2016, and was quilted for me by my friend Marybeth Tawfik. We were fortunate enough to win an NACQJ Award of Merit for this quilt in 2019. Since it uses the exact same block size as Jewel Drop, I thought I’d just share the pattern so you can make one too.
Jeweled Bracelet
Finished quilt: 54” x 70”
Basics
All seam allowances are ¼”. Fabric requirements assume 41” of usable width after selvedges have been removed.
Materials
- Copies of templates A, B, and Con page 67 of The Quilter’s Negative Space Handbook
- Template plastic
- White background: 2¾ yards
- Dark red solid: ½ yard
- Medium red solid: ¼ yard
- Light red solid: ½ yard
- Backing: 3½ yards
- Binding: ½ yard
Cutting
- Trace templates A, B, and C on page 67 of The Quilter’s Negative Space Handbook onto template material and cut out.
White background
- Cut one piece 28½” x 54½”
- Cut one piece 12½” x 54½”
- Cut 1 strip 6½” wide. Crosscut into (8) 3½” x 6½” rectangles.
- Cut 5 strips 3 7/8” wide. Crosscut into (48) 3 7/8” squares
- Cut 4 strips 3½” wide. Using template C, cut 18 pieces, then flip the template over and cut another 18.
Light red solid
- Cut 1 strip 7¼” wide, crosscut into (5) 7¼” squares.
- From the remainder, cut 1 additional 7¼” square and 9 pieces using template A.
Medium red solid
- Using template A, cut 9 pieces.
- Using template B, cut 18 pieces.
Dark red solid
- Cut 1 strip 7¼” wide, crosscut into (5) 7¼” squares.
- From the remainder, cut 1 additional 7¼” square and 18 pieces using template B.
Piecing
- As shown in Figure 1, sew a medium triangle B to each of the light diamonds A. Press, then sew another triangle to the adjacent side of the diamond. Repeat for dark triangles B and medium diamonds A.

- Sew a white background triangle C to each side of the completed triangle units. Note that you will need to use an original triangle C and a reversed triangle C for each unit. Make 9 light/medium and 9 medium/dark blocks.
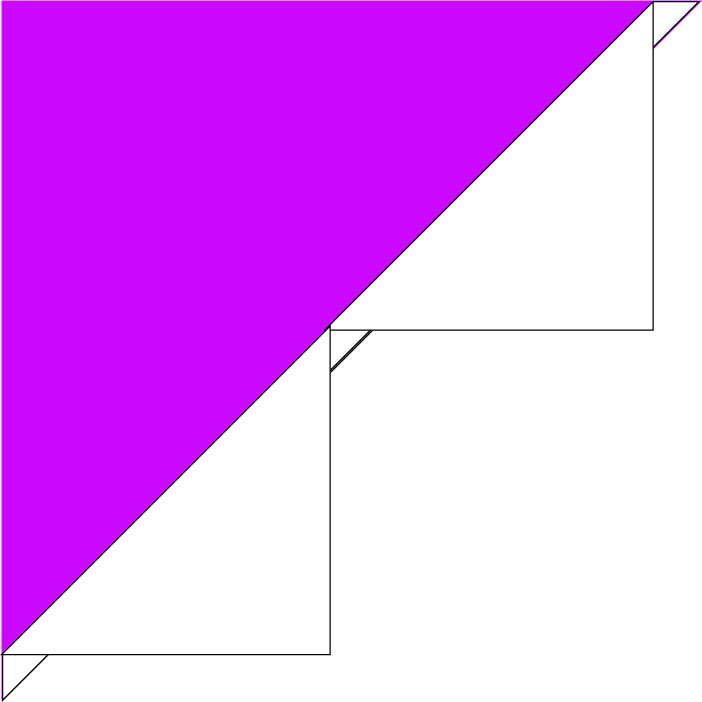
- To make sets of 4 flying geese at a time, take 1 colored 7¼” square and 4 white 3 7/8” squares. Draw diagonal lines across all the white background squares. Place as shown and sew ¼” from the line on both sides (shown as dotted line in figure).
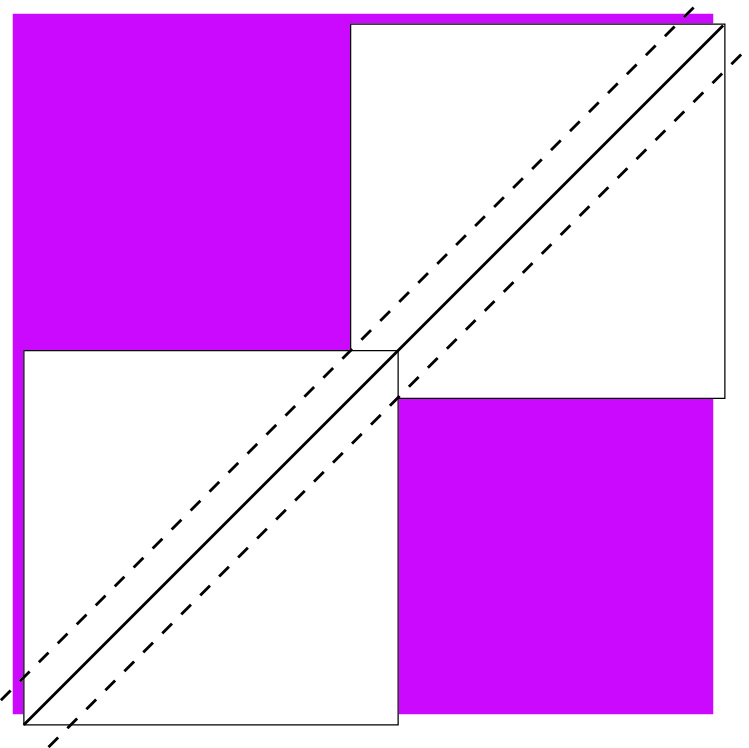
- Cut along the marked line and press. Your units will look like this:
- Place another 3 7/8” white background square on top of each unit as shown, and sew ¼” from the marked line on both sides (dotted line).
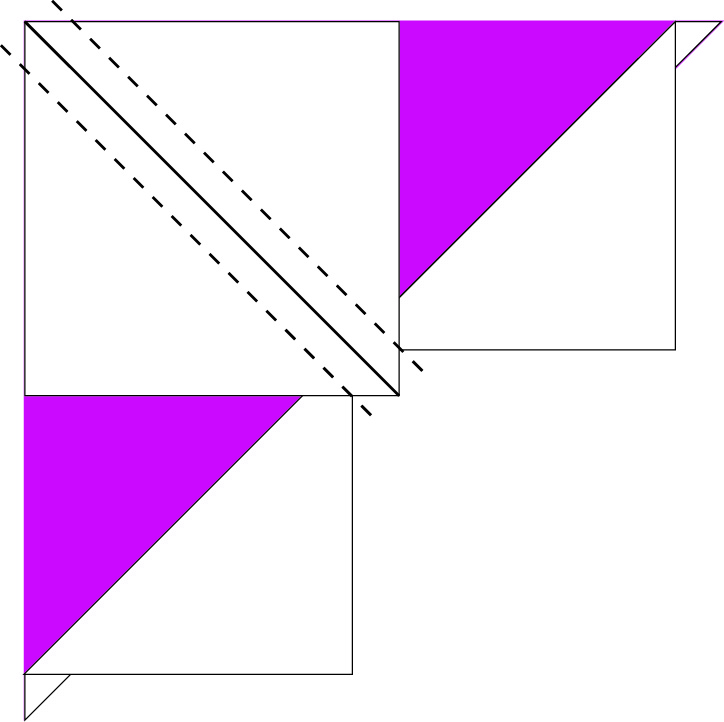
- Cut along the marked line and press. Trim corners. Each unit should measure 6½” x 3½”.
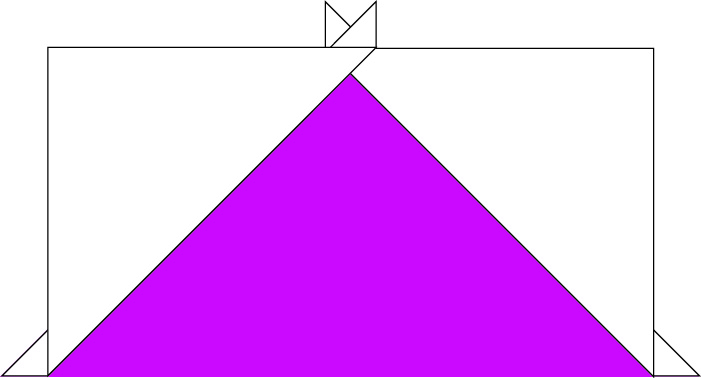
- Repeat to make 23 light and 23 dark flying geese units.
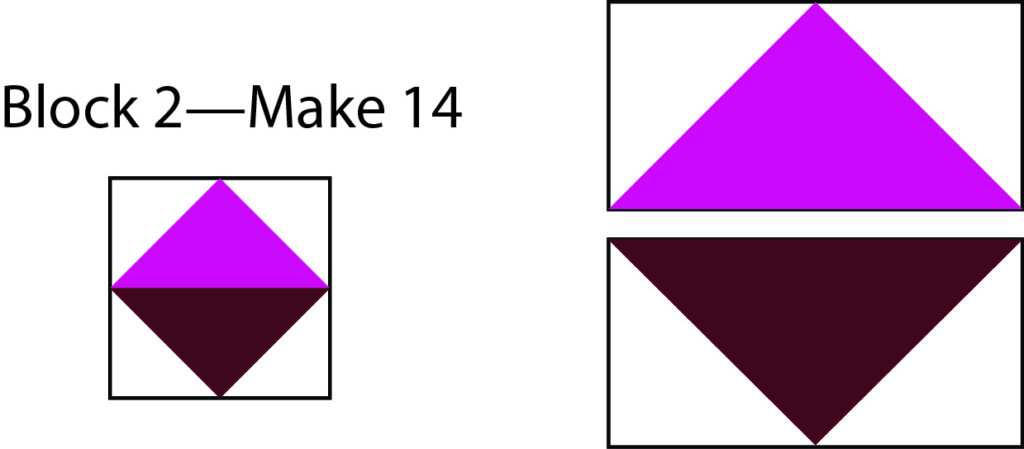
- To make on-point squares (block 2), sew each of 14 light flying geese units to each of 14 dark units along the long colored edges, as shown below (14 blocks).
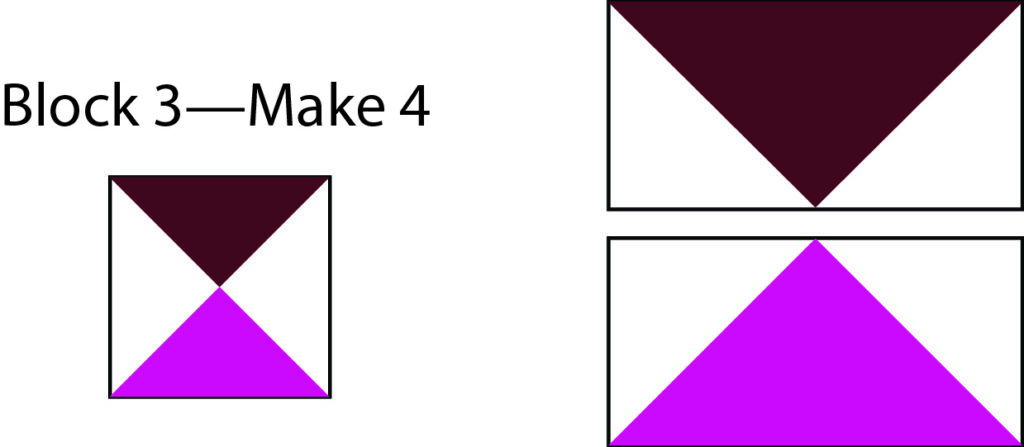
- Sew each of 5 light flying geese units to each of 5 dark units along the long white edges to make block 3 (5 blocks).
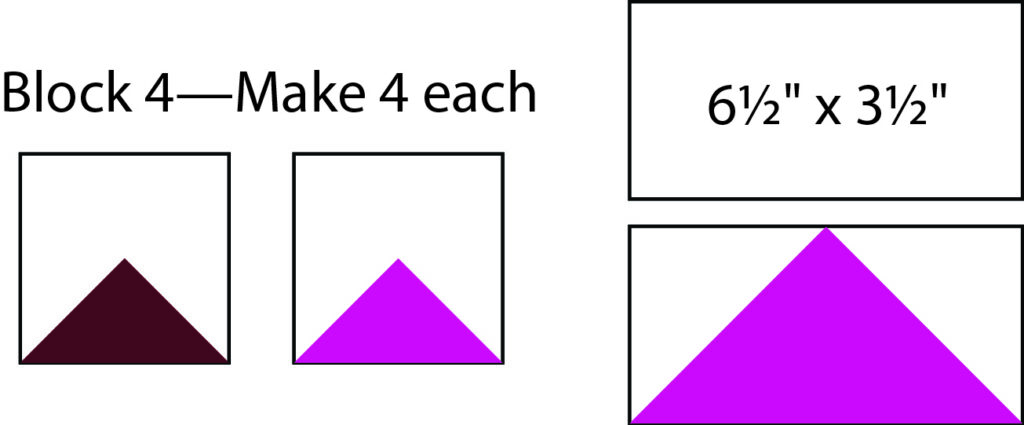
- Sew one 3½” x 6½” white rectangle to the top of each of 4 light and 4 dark flying geese units to make block 4 (8 blocks total).
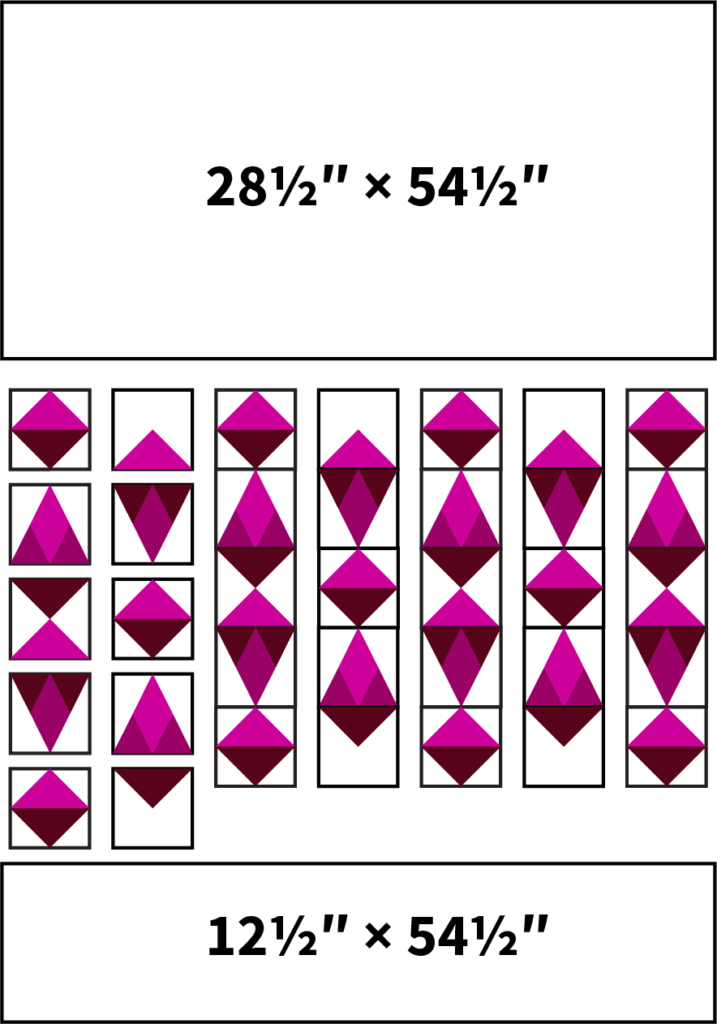
- Piece blocks together in columns as shown in the assembly diagram, then piece columns together. Add the top and bottom borders.
Finishing
- Remove selvedges from the backing and cut backing fabric in half. Piece together along the longer side.
- Sandwich and quilt as desired.
- Cut (7) 2” strips from the binding fabric. Piece together with diagonal seams. Press in half and finish the quilt with a double-fold binding.
That’s it! If you make this quilt, please share it on social media and tag it with #jeweledbraceletquiltpattern; I love to see what colors you come up with!

Absolutely LUUUUOVE your book!!! 😍🥰👏