A question I get frequently is whether or not one of my quilt patterns can be resized. So, I thought I’d put together a little guide on how you can do that! There are three ways to resize a quilt pattern:
- Adding blocks
- Resizing blocks (e.g. paper pieced blocks)
- Resizing the entire quilt design (or traditionally pieced blocks)
I’ll cover the first two here; the third will be another post!

Adding blocks
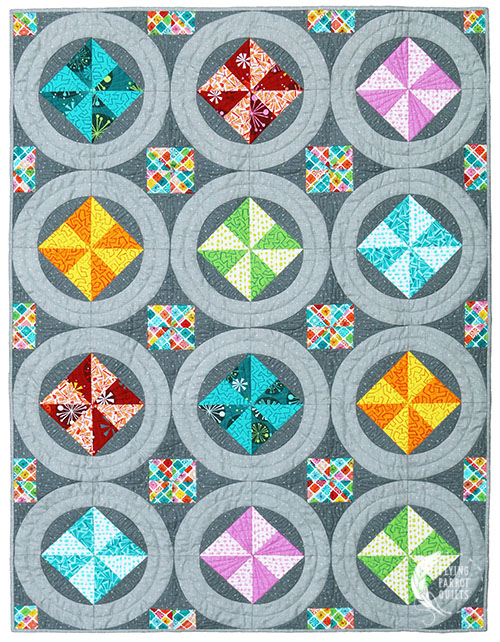
This is the easiest way of changing up your quilt size, and one that you may well have already done with a quilt yourself! This works well for more traditional block-based quilt patterns where the blocks repeat across the whole quilt, like for example my Pinwheel Rings quilt.

This particular pattern and many other patterns like it come with several sizes, but if none of them are quite right for your project, it’s really simple to make up a few more blocks. The only challenge you may encounter is figuring out how much additional yardage to buy. Here’s a quick formula for you to make a rough estimate:
Number of blocks you’re making divided by the number of blocks the pattern calls for times the listed yardage.

So, for example, if you wanted to add one more row and one more column to the quilt above, which has 12 blocks, you’d end up with 20 blocks. So 20/12 = 1.666. The pattern calls for 1⅛ yards of light gray fabric, so 1.666 * 1.125 = 1.875 yards.
As I mentioned, this is a rough estimate. Most pattern designers try to be pretty efficient with fabric and a quilt with twice as many blocks as another often doesn’t require twice as much fabric, so you’re likely to have enough with this number, but just in case you might want to round up just a bit. I’d probably just go ahead and buy two yards in this case.
Resizing templates
The second way of resizing a pattern that we’ll cover today is resizing whole blocks. What I’m describing here applies to paper pieced blocks, or to blocks that are made up of pieces that you have templates for. I don’t generally recommend trying to resize blocks that have traditional piecing instructions unless you’re a really confident quilter, but if you do end up needing to do that, you can use the technique I’ll cover in part two of this series.
For paper pieced patterns, you’ll be using your printer or a copier anyway to make copies of the templates, so you need to know at what percent size you need to print them. Tiny Jewel, below, will be our example—it’s a mini quilt that finishes at 18″, but what if you need a 25″ block?

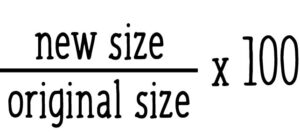
The formula for this is simple: new size divided by original size times 100.

So, 25/18*100 = 138.88. Thus, when printing your templates, you’ll want to print or copy at 139% (round to the nearest whole number). If you’re making your block bigger, the number should be greater than 100; if you’re reducing the size, it should be less than 100.
You’ll also need to remember that your seam allowance is changing too. So, be sure to redraw your seam allowance to be ¼” using your ruler rather than using what’s on your newly resized copies.
Next time, we’ll talk about how to recalculate all the pieces in a quilt so that you can resize the entire quilt design!


Thank you! I will definitely be using these formulas. So far my attempts at resizing have been hit and miss.
Thanks – great info. Thanks also for the reminder about resizing the seam allowance! I have started making “sofa throws” from regular blocks like Ohio Star – about 45 inches square – using just one large medallion block to show off the fabric that has larger patterns.
Thanks again, Joan