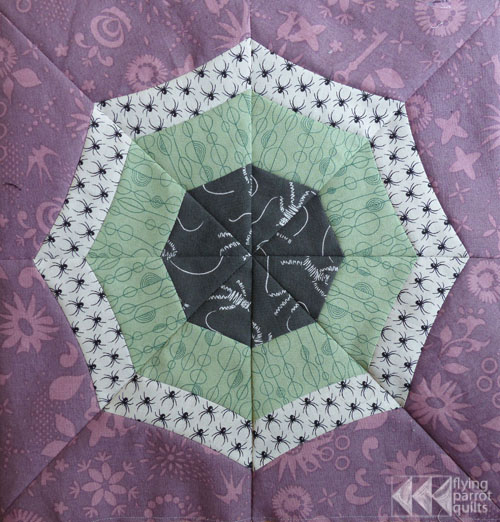
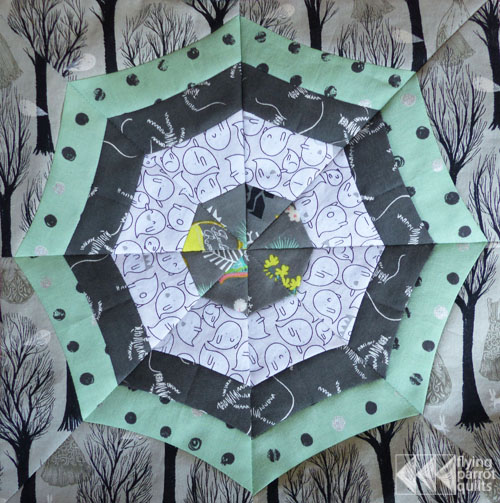
This week’s block involves some curved piecing! Don’t worry, though, the curves are very gentle, so this is an easy introduction to curves if you’ve never tackled them before. You’ll need 3 blocks that finish at 12″.
Trace all the templates onto a piece of template plastic and cut out. If you have the Phillips Simple Curve Ruler you can use it instead of the arc sections on page 3. Trace the dashed line on sections A and B onto your template as well. This is a reference line for trimming.
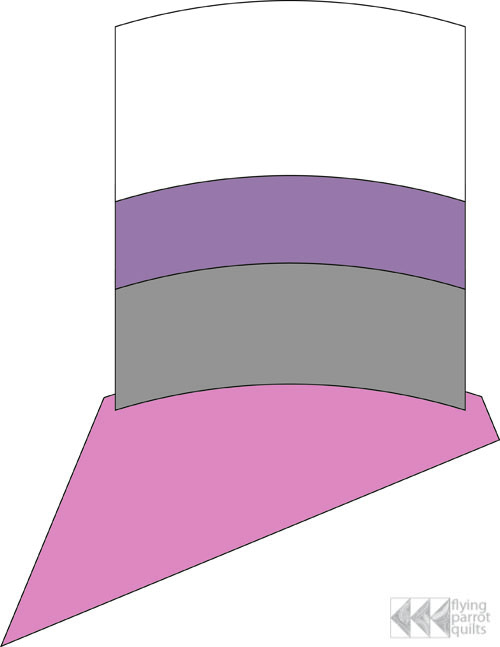
For one block, you will need to cut 4 each of Background Template A and Background Template B from your background fabric. The gray areas on the template are extra space to give you some leeway to trim accurately later on.
On this block, I wanted to keep the directional background fabric going in the same direction, so I placed the background templates very carefully on my fabric.
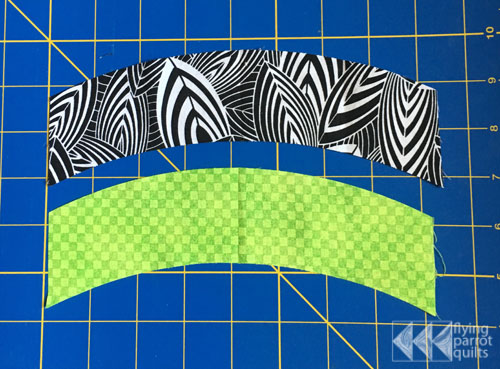
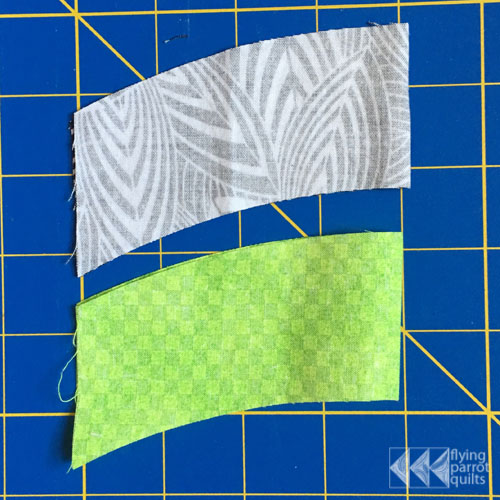
It is up to you exactly how to arrange your arc sections—your finished arc size should add up to 5″, so you could, for example, choose five 1″ strips, or two 1 1/2″ strips and a 2″ strip, etc. However you decide to arrange your fabric, you will need to cut 8 of each arc section.
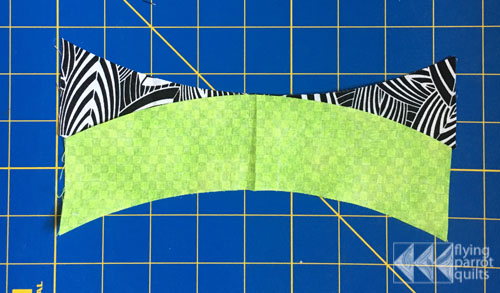
To piece your curved arc sections together, take two arcs:
Mark the centers by folding them in half and finger pressing a crease.
Place them on top of each other, wrong sides together, like this:
Line up the centers you just marked by creasing and place a pin.
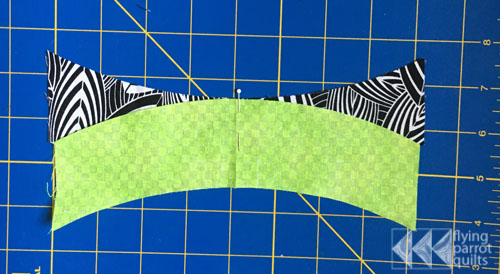
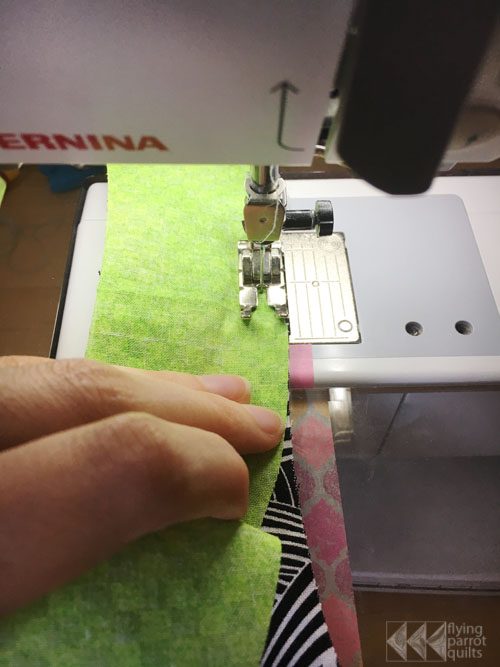
If you’re not comfortable with arcs yet, place another pin or two on one side of the arcs, lining up the raw edges.
Then, begin sewing with a 1/4″ seam.
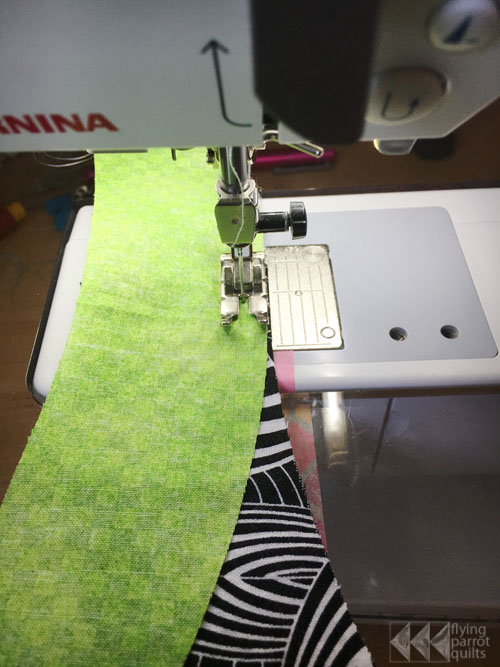
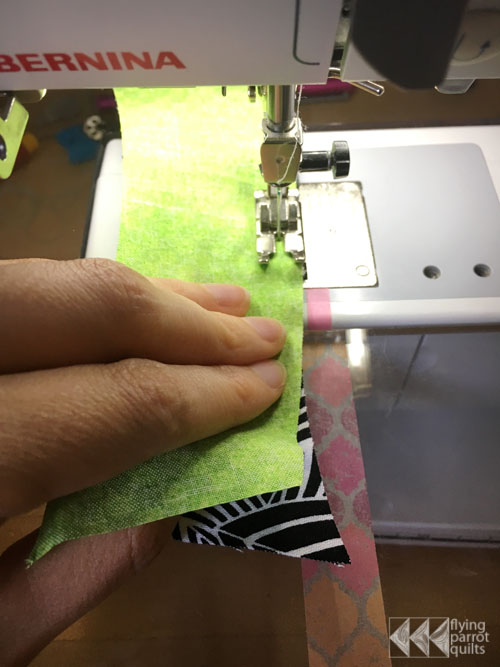
After you reach the center pin, you can use your fingers to gently manipulate the raw edges together as you go.
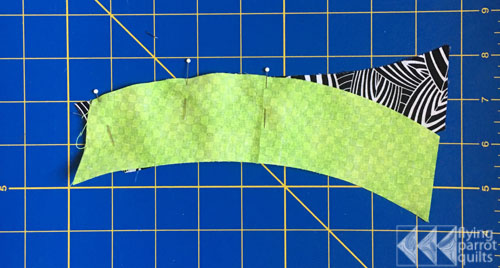
Your sewn arcs will look like this.
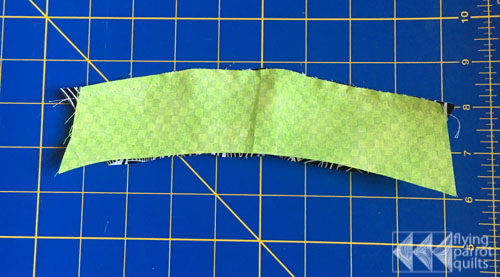
Press the seam towards the lower arc, and that’s your first set done!
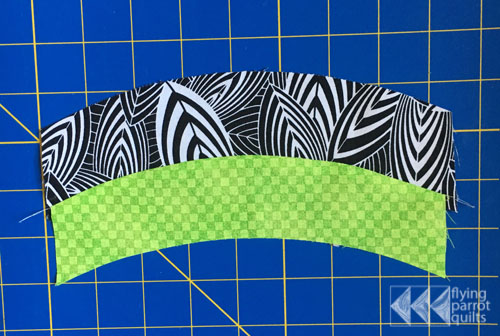
Continue adding strips as necessary, always aligning the centers of your strips. Repeat for the other eight strip sets, keeping the order of strips consistent among sections. As you get more comfortable with curved piecing, you will probably find that you only need the pin keeping the centers aligned!
Finally, add the bottoms (cut from Background Templates A and B), again keeping the centers of the curves aligned:
Place your section A template on top of a pieced section (that contains one of the Background Template A pieces), and line up the curve on the template with the bottom curved seam. Trim.

Trim your Section B pieces in the same way.
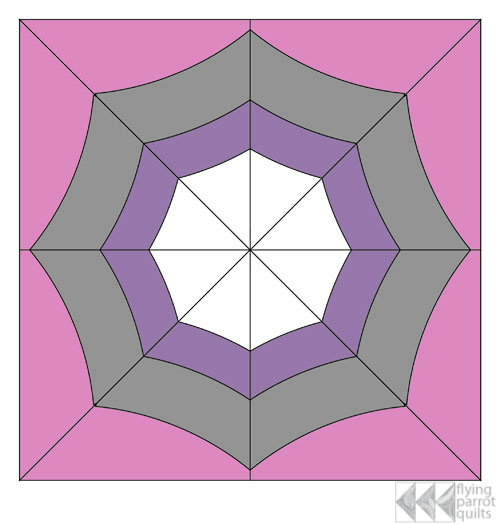
Sew the long side of a Section A piece to the long side of a Section B piece to complete one quadrant. Repeat for the remaining pairs.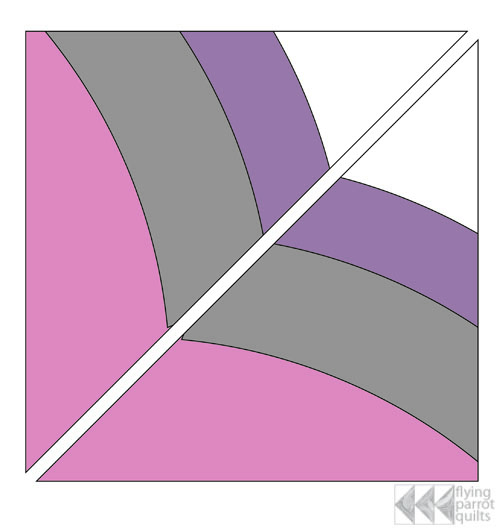 Then, sew the quadrants together into a full block!
Post your blocks with the hashtags #epichalloweenqal and #curvedspiderwebblock this week!


Just found your site through a mention from another blogger Mama Spark’s World and your QAL. I am going to attempt some of your featured squares. Thank you for posting such a neat project!
http://thriftshopcommando.blogspot.com
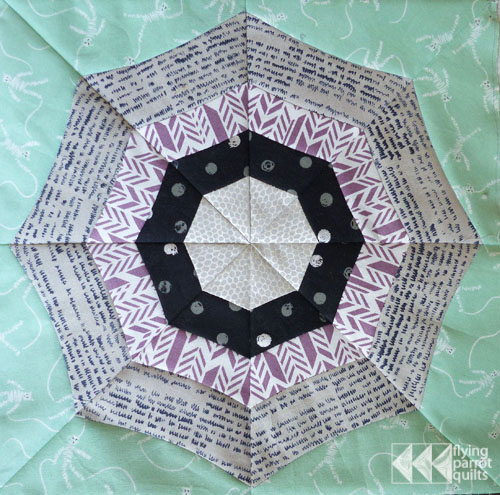
Any advice on how to get the middle points so clean and lined up? Mine ended up a little wonky, but all the other points of the web were lined up.
Once I’ve sewn the eighths of the block (i.e. the individual wedges) together into quarters, I always press my seams to the same side. That way, when you are putting them together, you can nest them, and I find that really helps. I am also a huge fan of glue basting and/or pinning. When I really need points to line up, I’ll stick a pin straight down, exactly through the points, and then insert pins on either side. (This is the same sort of pinning technique I recommend for paper piecing.) If you’re not familiar with glue basting, I really recommend looking that up, too, as it’s a really useful technique for all sorts of piecing!